Even in a world obsessed with perfection and precision, hand-printed products have always been cherished and appreciated. We love the imperfections of a block printed cotton fabric, the minor flaws in a hand-printed tablecloth; helping us visualize the hours spent creating that intricate piece of art. Block printing is a complex printing technique that uses finely carved wooden blocks to imprint a design on fabrics or a piece paper. When it comes to block printing on fabrics, India is one of the most famous sources for beautifully printed textiles and apparels.
What is block printing?
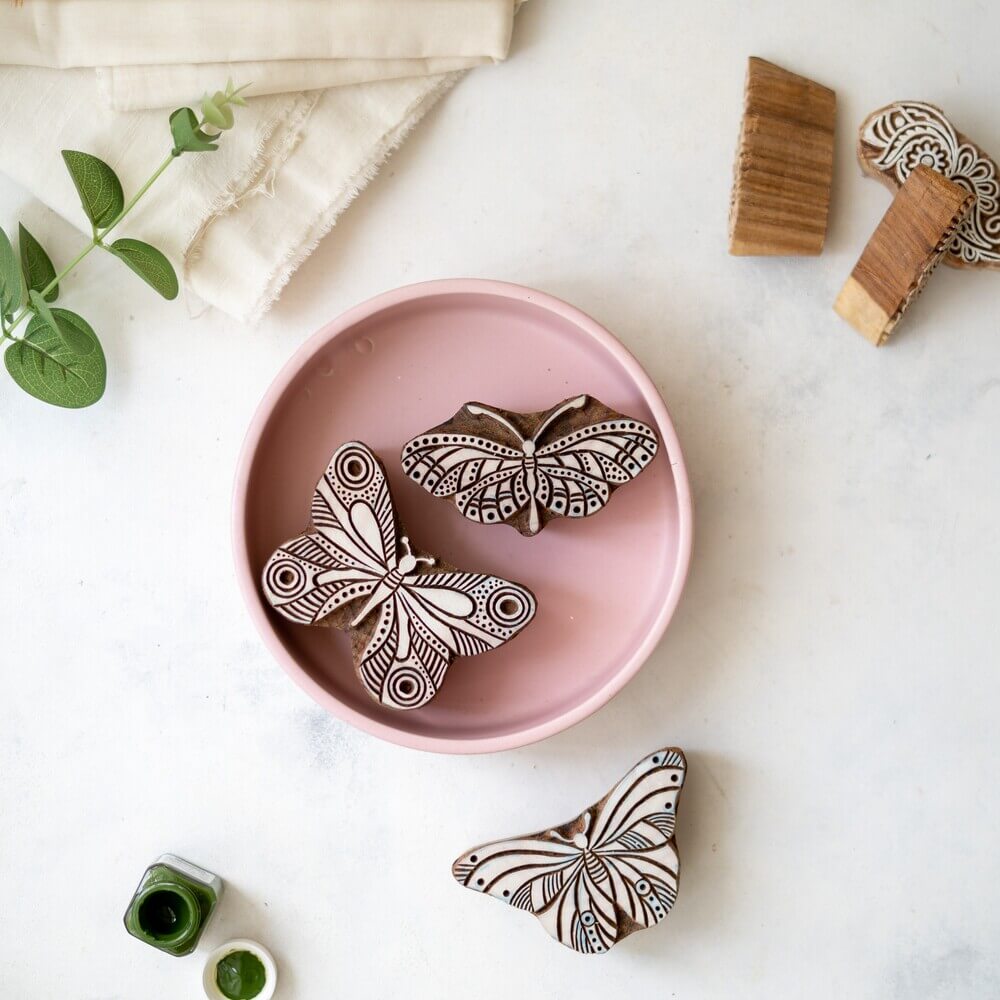
As the name suggests, the most important step lies in the creation of wooden blocks, which are intricately hand-carved stamps that are used to imprint beautiful patterns onto fabrics. The blocks are then dipped in non-toxic inks / dyes and stamped by hand on a large piece of fabric. It’s a time consuming process, which requires skill and artistry. Since the printing is done by hand, the images don’t always line up resulting in an imperfect but exquisite piece of textile art. Embrace the imperfections!
How to block print fabrics at home?
We’d love to help you try your hands at this textile craft in the comforts of your own home. It’s a fun DIY project that you can attempt over the weekend with your kids, to create a unique textile gift for that craftaholic friend or to add some handmade charm to your home with block printed cushions/curtains.
Materials required
- Wooden block or stamp
- Fabric- natural fibers would work best for block printing projects
- Acrylic or fabric paint or fabric dye
- Small bowl / inking tray for paint
- Sponge
- A flat surface lined with cardboard
- Brayer / Rubber roller
The Process
- Lay out all your supplies, this includes a small bowl or inking tray, rubber brayer, water-based ink or fabric paint, the carved block, and the fabric. Cut your fabrics into smaller pieces if you wish to practice block printing before creating larger block printed pieces.
- Pre-wash your fabric to remove any residues / finishes that might interfere with your ink. Iron your fabric to remove any wrinkles
- Smooth your fabric onto the cardboard lined flat surface, staple or pin the fabric onto the cardboard and ensure that there are no ripples in the fabric.
- Pour the paint / ink into the bowl or inking tray.
- Using your brayer, roll paint onto the stamp. Make sure that the paint is evenly spread. You can also use a sponge to dab ink onto the block.
- Practice your printing technique on a piece of paper. It’s important to apply even, uniform pressure to your block. Once you have perfected your technique, move on to printing your fabric.
- Roll the ink on your block and apply it to the fabric, pressing down firmly. Gently lift the stamp off the fabric and use your free hand to ensure that your fabric stays on your work surface as you lift the stamp. Imperfections are a part of this process so don’t fret too much if each stamp yields a small amount of variety.
- Repeat the process until you get the desired result.
- Allow your printed fabric to dry for 24-48 hours.
- Once the ink is completely dry, iron your fabric pieces for 3-5 minutes per side, this will help set the ink in the fibers and ensure colourfastness
- Wash the pieces in water and dry in the sun.
- Don’t forget to clean your block after printing and store it after it is completely dry.
We at Craftise HQ are always trying to make the lives of DIY lovers a little easier and a lot more craftastic. Explore our collection of exclusive hand-carved stamps to print fabrics, totes, cushions, tapestries, packaging materials- the list is endless. We can even turn your designs into pretty little stamps; just mail us your designs and we’ll have your personalized block ready in no time.
P.S. Don’t forget to save this blog for the next time you are in need of a DIY fix and share your printing adventures with us.
#craftywithcraftise